|
Hints Tips & Rants
by Dale Atchison Tampa Bay Computer Society |
I keep getting questions from clients and readers about how to do the simplest things, most of which haven't changed since Windows 3.1. So many people are getting less from their computing experience, just because no one has shown them a handful of basic Windows techniques. OK, that's my cue, I'm ready for my close-up. Try not to doze off.
Mouse Conventions
When I say "click", that means a single click of the left mouse button. "Double-click" means two clicks of the left mouse button, so close together that Windows interprets the two clicks as a single event. "Right-click" means a single click of the right mouse button; there's no such thing as a double-click using the right mouse button. [addendum, 11/28/2009: Make that, "Most of the time, there's no such thing..." Turns out, Google Earth, and maybe some other online maps, use a right-double-click as the "Zoom Out" command. Google, maker of the finest monkey wrenches ever thrown into a brilliant dissertation.]
There's also 'click-and-drag'; that's where you move the mouse cursor (or pointer --- usually an arrow) over an icon, border, or other on-screen object, press and hold the left mouse button, move the cursor AND the selected object to wherever you want it, and release the button. Most of the time, click-and-drag is a left button event, but once in a while, there's a reason to do it with the right mouse button instead. But, if I don't specifically say "Right-click-and-drag", it's a left mouse button trick. Got it?
Just to confuse the issue further, you can reverse these conventions if you are left-handed --- just click Start » Control Panel » Mouse » Left-handed » OK. Once you've done this, substitute 'left' for 'right' in the previous paragraphs, and vice-versa.
Managing Windows
When there are no programs running, you are looking at a virtual desktop, the surface on which you will spread out all the documents and programs you run for work or play. At the bottom of the screen (usually) is a horizontal bar; if it isn't there, or at any other edge of the desktop, move the mouse cursor slowly to the bottom of the screen, or to each of the other screen edges, and it should appear.

At the left end is the Start button; you click on it to open the first level of the Windows Start Menu, or you can right-click it to change how the menu looks and acts. 'Nuff said on that.
 On the right is an area that looks like a button that's already been pressed, called the System Tray. The System Tray contains icons representing services and background tasks that are always running, usually including the clock, the system volume control, your anti-virus program, and any 'third-party' firewall program; it can also contain icons for several hardware control programs, like network adapters, mouse or touchpad, background printer control program, video card settings shortcut, etc.
The area between the Start button and the System Tray is called the Taskbar; this is the area where you will see buttons or icons for every program that's open or running, but not displayed in the System Tray; the Taskbar also contains any docked toolbars you have open.
As mentioned above, the usual, 'default' location of the Taskbar is at the bottom of the desktop. To keep it there, and to prevent other accidental changes (which I'm about to tell you how to make), right-click a blank spot on the Taskbar, and make sure there's a check mark next to Lock the Taskbar --- if not, put one there by clicking on (or next to) the words Lock the Taskbar. This will prevent resizing, moving, rearranging, and/or re-apportioning the Taskbar.
Sounds boring to me. Right-click the Taskbar, remove the check mark next to Lock the Taskbar, and let's go crazy! First, left-click any blank spot on the Taskbar, and drag it to any edge of the desktop where you'd rather see it. Then move the mouse cursor slowly over the edge of the Taskbar until it changes to an arrow with a head at both ends; at this point, you can click and drag to resize the Taskbar.
 When the Taskbar is unlocked, there will be vertical bars separating the toolbar area from the Start button and the icons representing programs and open windows; there will also be vertical bars between individual toolbars. You can click and drag these bars horizontally to change how much space each toolbar takes up; if you make the space too small to display all the icons in the toolbar,the last icon visible will be followed by a double greater-than symbol ( » ), indicating more icons available to the right. You can also click and drag a toolbar completely off the Taskbar to the desktop, in effect 'un-docking' it; drag it back to the Taskbar when you get tired of playing with it.
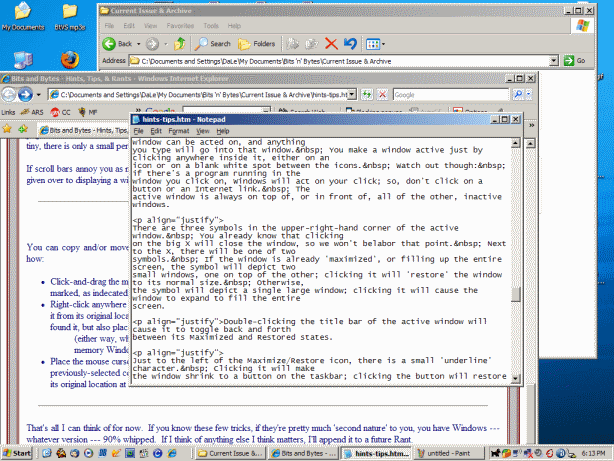 |
There are three symbols in the upper-right-hand corner of the active window. You already know that clicking on the big X will close the window, so we won't belabor that point. Next to the X, there will be one of two symbols. If the window is already 'maximized', or filling up the entire screen, the symbol will depict two small windows, one on top of the other; clicking it will 'restore' the window to its normal size. Otherwise, the symbol will depict a single large window; clicking it will cause the window to expand to fill the entire screen.

Just to the left of the Maximize/Restore icon, there is a small 'underline' character. Clicking it will make the window shrink to a button on the taskbar; clicking the button will restore the window to its previous size and position.
A few applications modify the basic Windows 'window' to include a fourth icon in the corner: a dot, indicating the tiny hole a tack or push-pin makes when you pin a sheet of paper to a bulletin board; clicking this icon will minimize the window and 'pin' it to the system tray (usually the lower right-hand corner of the screen), rather than to the taskbar. And at least one program I know of, EasyCleaner, adds what looks like another Minimize icon just to the left of the standard one, but it still behaves like a push-pin: clicking it minimizes the window to the System Tray, not the Taskbar
At the far left end of the title bar, there is an icon; it varies, depending on what program is running in that window. Double-clicking this icon will close the window and any program or file open in it; if there have been changes made to a data file since the last Save action, Windows will give you the opportunity to save the changes before closing the file.
Moving slightly to the right, you see the window title: the name of the program open in the window, as well as the name of the file that program is working with, if any.
Double-clicking the title bar of the active window will cause it to toggle back and forth between its Maximized and Restored states.
You can move a normal window to any place on the screen you want it, just left-click-and-drag it by the title bar. You can only drag it to the point where there's a tiny sliver of title bar still visible.
You can resize a normal window by moving the mouse cursor slowly over one of the window's edges til the cursor changes to a double-headed arrow; at this point, click and drag the edge to expand or shrink the window. If you move the cursor slowly over the corner of a window, the pointer will change to a diagonal double-headed arrow; if you click and drag at this point, you can resize the window vertically and horizontally at the same time.
This seems obvious to me, but I'll make the point for anyone who doesn't eat, sleep, dream, and otherwise obsess about computers to the exclusion of all other interests: if a window is already maximized, or taking up the entire screen (as denoted by the presence of the 'Restore' button described above), you can neither move nor resize it until and unless you first click on the Restore button to 'un-maximize' it.
If a window isn't large enough to display all its contents at once, there will be 'scroll bars' at the right, or at the bottom, or both. Scroll bars look like a sunken track containing a solid moveable block, and with arrows pointing away at each end. Clicking one of the arrows moves the apparent point of view a little bit in the direction the arrow points; clicking to either side of the moveable block will move the point of view a full screen in that direction; or, you can click and drag the moveable block to display exactly the portion of the window contents you wish to see. The relative size of the movable block gives you an indication of the size of the page; if the block is almost the entire length of the track, there's just a little of the page that isn't currently displayed --- if the block is tiny, there is only a small percentage of the page currently on-screen, with the rest viewable by use of the scroll bar(s).
If scroll bars annoy you as much as they do me, click on the Maximize button at the top of the screen --- the more of your screen is given over to displaying a window, the less the chance that scroll bars will be necessary.
Cut / Copy / Paste
You can copy and/or move text, pictures, and most other content types within a document (file) or between documents. Here's how:
- Click-and-drag the mouse cursor over all the content you want to move or copy; this will cause it to become 'highlighted', or marked, as indicated by the colors reversing within the highlighted area
- Right-click anywhere in the highlighted area, then select (left-click) Cut if you want to move the highlighted content, removing it from its original location as you place it somewhere else; click Copy if you want to leave the original content where you found it, but also place a copy of it in another location in this or another file;
- (either way, what you did was put a copy of the highlighted content on the Windows 'clipboard', a segment of system memory Windows uses just for Cut/Copy/Paste operations)
- Place the mouse cursor in the location where you want the content to appear; right-click, then select (left-click) Paste. The previously-selected content will appear here; if you chose Cut in the previous step, the highlighted content will disappear from its original location at the same time.
That's all I can think of for now. If you know these few tricks, if they're pretty much 'second nature' to you, then you have Windows --- whatever version --- 90% whipped. If I think of anything else I think matters, I'll append it to a future Rant.
Till next month...